Forecast - Inshore Waters, Gibraltar Point to North Foreland
W or NW 3 or 4 becoming variable 2 then becoming S or SE 3 or 4, smooth or slight, fair, good
HW North Fambridge 04:28UT
LW Harwich 09:11UT 0.8m, HW Harwich 15:54UT 3.7m
Dep North Fambridge approx. 05:00UT towards Harwich e.t.a approx. 14:00UT
Intend mooring Halfpenny Pier, Harwich, if not available will divert to Shotley or Levington
Wednesday, 31 May 2017

Tuesday, 30 May 2017
Spring Cruise 2017 - Days 2 to 5
Circumstances got in the way of updating the blog over the last few days so here's a potted catch-up
 Our cousin Maire joined ship on Friday evening and a catching up session ensued which went on well into the early hours of Saturday morning!
Saturday was spent recovering (!) and preparing for the third Fambridge River Festival the following day
Glen arrived on Saturday on the final leg of his South Coast tour in his new camper and a second catching up session ensued into the early hours of Sunday morning!!
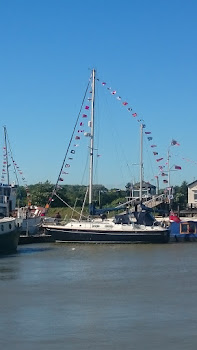
Pagan was dressed overall ready for the show which got off to a great start.
Unfortunately, a family crisis developed which necessitated us all decamping half way through the show and dashing back to Kettering. This kept us in Kettering all day yesterday too.
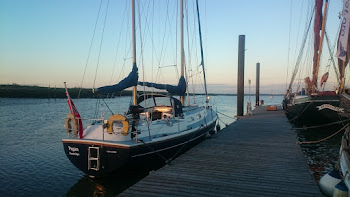
Happily all's well that ends well and first thing this morning Jane and I were back on the road to Essex. Meanwhile, the marina lads had moved Pagan onto the river pontoon for us so we didn't risk being neaped in our berth and unable to go anywhere
 Today has been all hands to the pumps to get ready to go sailing tomorrow. The new autohelm installation has been finished (a bit Heath Robinson in places but it will serve for now - I'll try and get some pics posted in the next couple of days
Pagan is now all ready to go (we hope!) and we'll be heading off about 06:00 towards Harwich
Friday, 26 May 2017
Spring Cruise 2017 - Day 1
Summer is icumen in. Is it ever!
It's been seriously hot the last couple of days and of course this is my busy time of year work wise. But all work and no play etc.
Jane has 12 whole days off so yesterday I drove up to Kettering, had the van serviced and did my laundry ready for a very early start back down to Essex this morning.
We had a good run down, for once and arrived earlier than we'd thought we might. On stepping aboard, the dodgy duckboard in the cockpit, which I've been meaning to beef up, gave up and I put my foot through it!
Ho hum.
After a bit more sleep, I cut a piece of ply to suit and screwed it down as a temporary fix. Some nifty work with the table saw and bench planer will be needed to make new teak sections to rebuild it but that will have to wait
My next mission was to sort out a working light in the guest cabin ready for the arrival later of my cousin who is joining us for the weekend. Then it was all hands to tidy boat
Tomorrow, I need to complete the new autohelm install (it needs power and I need to figure out a means, even if only temporary, of securing the motor).
And on Sunday it's the third Fambridge River Festival which promises to be bigger and better than ever this year.
Monday will see us off our berth late afternoon and, if all goes to plan, underway.
Thursday, 20 April 2017
Re - frigerated
Why, I can't help but ponder, is it a "refrigerator"? Surely something must be frigerated before it can be refrigerated?
Well anyway, our frigerator hasn't been frigerating for quite a while necessitating the use of a noisy, inefficient and rather small cool box and yesterday the time had come to do something about it
Just getting the fridge box and mechanicals out from under the saloon settee proved to be a bit of a challenge but eventually I could see what was what
And what I discovered was that the compressor and cooling coil had been mounted on a plywood structure attached to the side of the fridge box and that the new gubbins as supplied on a metal base plate wouldn't fit in the available space
One option was to remove the divider between the fridge compartment and the next storage space (already half the size it would have originally been) to make more room at the cost of space to store other things. The alternative was to remove the new compressor and cooling coil from the base plate and mount them on the plywood as per the original setup
At the risk of causing terminal damage out of warranty, I went for the latter option. Much careful bending of pipes and drilling of new mounting holes etc later and the job was done
The next mission was to replace the original flat evaporator plate with the new oval one. Because of that size of the pipe couplings this meant drilling out the hole where the cooling pipe exits to fridge box. The thermostat fitted neatly in place of the old unit without modification
All that remained to be done before reinstalling the unit was to fill the oversize hole around the cooling pipe and the gap in the box insulation that had been cut out (and never filled) to accommodate the thermostat with expanding foam
Reinstalling the assembly was a lot easier than getting out out! Then it was simply a case of connect up the 12v supply and, offering a prayer to any passing gods who might be listening, turning it on
And happy days, we were re-frigerated!

Thursday, 6 April 2017
Bogoff, bog on
They do say, and it is truth, that any conversation between two boaters will eventually descend into a discussion about toilets. It is that time, dear reader. I shall try to avoid being indelicate.
The heads aboard Pagan were unsatisfactory on two counts.
Firstly, the toilet itself was, not to put too fine a point on it, knackered. A marine sea toilet is a complex beast compared to the domestic variety, full of valves and seals and those valves and seals were no longer valving and sealing as they should.
The second issue was the lack of a holding tank. Marine toilets on (smaller) seagoing craft routinely discharge direct to sea. At sea, this really isn't a problem. The volume of waste discharged is microscopic and spread over a very large area and it simply adds nutrients to the water.
However, in an enclosed marina it can be a different matter and it's generally considered unpleasant to discharge solid waste in a marina.
And of course, we have a specific problem as we're only afloat twice a day and having poo on the mud alongside the boat awaiting the next tide to carry it away is simply not to be contemplated
After much cogitation, we decided to strip out the existing (and rotten as it transpired) shelf from the locker behind the heads and build a new shelving arrangement incorporating a small 25l gravity discharge holding tank
Although small, that will be sufficient to act as a buffer for a day or two between tides and when we're in a marina. It can simply be discharged on the ebb or when we get out to sea and the total quantity of waste in the tank is not so great as to cause unpleasantness when discharged on our mooring (being mostly flush water anyway)

The holding tank (top left) tucks neatly into the corner of the space and sits on a new shelf plus it's bolted back to a rail across behind it. It shouldn't go anywhere no matter how extreme the conditions.
The tank discharges to the waste seacock via a valve which, irresistibly, will forever more be known as the Dump Valve! The valve (blue handle) can be seen below the tank.
Commonly, on gravity discharge systems, the seacock itself is used but I wanted to avoid that for two reasons. Firstly, if a blockage occurs I want it to happen above the waterline and secondly I didn't want waste accumulating against a closed seacock and choking it up.
Below and to the right of the tank is a diverter valve which selects between seawater and fresh water flush. Another consequence of being on a mud berth is that we can't use seawater to flush the loo when the tide is out. And even when the tide is in there's a tendency to suck mud up into the pipework or, worse, the loo itself (which has happened and has partially blocked the flush outlets around the rim of the toilet)
To avoid any danger of cross-contamination of the fresh water by seawater or backing up from the toilet, there are no less than two non-return valves and three loops in the system.
The final loop, fitted with an anti-syphon valve, is in the pipe between the pump and the toilet bowl. (For the life of me I don't understand why people persist in fitting the anti-syphon valve ahead of the pump where it severely reduces the effectiveness of the flush)
 Of course, any job of this nature inevitably involves drilling holes in the boat.
In the course of the installation, Pagan acquired two new tank vents, one for the holding tank (aft) and a second for the main water tank (forward) plus, whilst I was at it, the skin fitting for the shower discharge pump (further down the to-do list)
Also, on deck, a big hole had to be drilled for the deck pump out fitting. This was complicated by Pagan having a balsa cored deck which meant raking back the balsa and filling the cavity with epoxy - the last thing you want is water getting into the balsa core.
 The final element of the installation was a brand new toilet and pump. The cost of the parts to refurbish the existing pump is about three quarters of the cost of replacing the whole lot and total replacement solved the problem of the clogged up passages in the old loo.
And finally I was able, quite late last night, to reinstall the locker front and then tidy and clean the compartment.
There's some making good of old holes still to do at some point but that's finessing that can wait until there's nothing more urgent on the to-do list
The new installation works a treat although flushing, at least on fresh water, is slightly harder work than usual which is not surprising given the plethora of loops and non-return valves
I'm implementing a strict ban on using seawater flush on our home berth to avoid any risk of clogging up the new loo
I shall also keel haul the first person to put anything they haven't eaten or drank down the bog, other than recycled bog roll*. He or she who blocks the system will get handed a pair of marigolds and told to unblock it
* Cheap recycled bog roll simply dissolves away to nothing very rapidly. Expensive quilted loo paper, whilst softer on the bum, stays intact for much much longer.
PS. A top tip from fellow sailor Keith is to use a hair dryer to soften up the hose ends. It works considerably better than the old trick of dipping the end in boiling water (especially on sanitary hose) and removes the risk of scalding yourself
Tuesday, 4 April 2017
Reflections on a winter afloat and times ahead
It's been a while, dear reader! Over two months in fact
And until spring finally sprang within a last fortnight it's been a frustrating couple of months to say the least.
When it hasn't been bitterly cold, and most days it has been, it's been damned windy. And whether freezing or blowing half a gale, conditions for working on boats have been almost constantly poor.
Apart from making it difficult to earn a crust, it's held up all the projects I wanted to complete over the winter on Pagan.
 |
| Sunshine to the left of us, sunshine to the right of us. Rain and wind overhead! A typical day for this winter |
Life aboard has, however, been comfortable and cosy. The blown air heating system is extremely effective and worth every penny. It not only keeps the boat toasty, it is very effective at preventing excessive condensation.
There is a cost though. During the weeks on end that the temperature stayed, at best, in low single figures during the day and dropped below zero at night we burnt a lot of diesel. Over 120 litres in two months in fact. Even at 100% domestic use tax, that's added up to over £75.00 and there's been electric bills, travel costs to and from Kettering and all the other costs of living all to pay for during a period when I've been able to generate very little income
So I'm currently thinking that staying on board all winter is not worthwhile, at least financially, unless we're both able to be here and we don't need to make any money during the depths of winter. That's an unlikely prospect at the moment.
I think next winter will see a change of plan with Pagan coming out of the water sometime in November to be winterised and parked in the yard until sometime in March. We don't fancy leaving her unattended on her berth because, due to our exposure to Easterlies, it's not unusual to need to adjust warps and fenders and if it ever threatened to be really bad we'd need to shift into a more sheltered berth temporarily.
With Pagan tucked up for the winter, I can seek some temporary employment in or around Kettering and then pick up the marine work again once the weather breaks - I'd certainly think twice about taking on a major project over-winter again unless the boat was going to be under cover
It's not been all bad though. If it wasn't for the need to put pennies in the beer, baccy and sailing kitties, and if it wasn't necessary for Jane to be in Kettering, I'd have enjoyed the winter on board. It's unbelievably peaceful on the river in winter, the scene out of the saloon windows has been breathtakingly beautiful at times and, if I'm being totally honest, I'm never happier than when I'm pottering around doing whatever I fancy doing or doing nothing at all if that's what I fancy!
But Spring, thankfully, has at last sprung. There's a mad dash to complete all the work that I had hoped to do over the winter before the "season" starts properly and, as always, there's the usual pile up of work that people want done by Friday when my diary is now full until May! Such is life.
With the clocks going back and the days getting warmer and longer, I've been able to knock off an hour or two or even three on the Pagan refit after putting in a day in the yard on other people's boats so progress is at last being made (I'll post in detail as each element of the project is completed)
And the prospect of getting some serious sailing in is coming ever closer. As usual, we won't be day sailing and, given the challenges of getting on and off our berth, there'll be little if any weekending, But we've got three decent spells on board lined up in Spring, Summer and Autumn
Our Spring cruise starts the Friday before Spring Bank Holiday but we won't be going anywhere right away! It's the third Fambridge River Festival on the Sunday and once again I'm performing live during the day. It's shaping up to be bigger and better than ever
We've also got a very special guest, or possibly guests, on board for the weekend having recently got back in touch with my lovely cousin Maire who last came boating with us more years ago than I suspect any of us care to remember to another festival, on that occasion the Northampton Boat Rally that Glen and I used to help organise. Maire's daughter Rosie was with us on that occasion and still talks of it I'm told and hopefully can make it as well
Once the show is over, Jane and I will spend a week pottering around the (fairly) local area getting the hang of sailing Pagan as a couple.
The summer cruise, due to imprecations from the crew, is now shaping up to being a full month away from base. A whole 28 days of sailing and beer! It's tempting to get carried away with extravagant passage plans with that much time in hand but I'm restraining myself and if we get as far as Weymouth I'll be happy. I'll be happy wherever we get in fact!
The autumn cruise is still up in the air, perhaps literally. The possibility of flying out to (probably) Italy to spend a week with our very good friends (and bestest customers!) aboard Laurin is still pencilled in the diary but it's subject to circumstances and if it doesn't come off Jane and I will have another ten day pootle around the Thames Estuary
So there you are up to date dear reader. The next instalment will be very much focussed on that perennial favourite topic amongst boaters - toilets!
Tuesday, 24 January 2017
Water, water, no longer everywhere ....
It's been a long time coming (frustratingly) but at last the new water tank is in and connected up ...

And I am good! Very good!! I calculated that the new tank would have a usable capacity of 53 gallons (just over 240 litres). Well I've timed how long it takes to pump 10 litres and timed how long it takes to empty the tank from full and ...
The tank has a usable capacity of ... 52.8 gallons (exactly 240 litres!)
I've still got to secure the tank in situ before we can go sailing (nearly a quarter of a ton wandering around below the v-berth would not be a cunning plan) but that's a job for later on as I now need to get on with the rest of the new plumbing