Chap wandered over this morning and asked me "What's the best way to remove old antifoul then?"
I pondered for a moment or three and replied ...
"Well I've tried expensive chemical stripper. It's slow, hard work and, well, expensive"
"I've tried home made chemical stripper. It's slow, hard work and dangerous"
"I've tried powered scrapers. It's slow, hard work and risks damaging the gelcoat"
"I've tried tungsten carbide scrapers. It's slow, very hard work and the blades don't last long"
"And I've come to the conclusion that the best way to do the job is ..."
...
...
...
"Pay somebody else to do it!"
Jesting aside, my conclusion a week ago that another couple of days would see the job done was wildly inaccurate. After another four long days with chemicals, scrapers and sanders, I've made progress but I'm far from finished getting the hull back to a good base. The port side is done to about midships, but I've got the beamiest stretch still to scrape and sand whilst the starboard side is back to the stubborn stuff
The original plan would have had us back in the water today. Realistically, I can't see it happening for another month. Again realistically I won't be surprised if getting the hull back to a sound base takes another couple of weeks and then we've got to make good any scratches and dings before applying a new epoxy barrier followed by undercoat and whatever brand of antifoul I finally decide to waste my money on
Something will have to be done, at least short term, about the topsides paintwork too. (The "topsides" is the area of the hull between the waterline and the deck by the way). I'm hoping I can touch up the numerous scratches and dings and polish it up to a reasonable appearance at least for now. Ideally I'd strip the paint off the topsides as well and repaint the whole lot but there's neither the time nor the money to do that this year
And then we need to rebuild the stern gear. Everything is ready now for it all to start going back together so I'll make a start on that next week when my now permanently aching shoulders can't take any more scraping and sanding!
It's a family weekend this weekend so it'll be Monday afternoon before I get back on it. There's not been a lot of point posting daily blog updates as it's a dull and boring job which would make dull and boring reading
Friday, 22 July 2016
Thursday, 14 July 2016
Bearing bodgers
I made an early start today back on the antifoul stripping.
I used the last of the caustic soda to make up a stronger batch than last time and I also decided to give it a longer time to work
So once it was slopped on, I set about doing some tidying up and popped up to the DIY store at Maldon to see if they had any more caustic. No joy
After a good three hours of "cooking" I set to with the pressure washer. I was delighted with the result. It removed several layers of antifoul at worst and all of it in some places. It even proved effective at removing the blue gunge
It will take another major go at the port side and a lot of spot treatment of the particularly tough bits but I reckon another two days work will have it done. With the evolved technique in hoping the starboard side will be done a lot quicker
Meanwhile, as I was blasting away with the pressure washer, a mate with access to a press popped by to pick up the cutlass bearing and housing which he's going to sort out for us
I'd completed the wash down by early afternoon so I decided to get on the road to Kettering early
On the way, I dived in to grab another half a dozen bottles of caustic which I hope will be enough to do the job
Back home, my mate messaged me to say they'd got the old bearing out and found that the new bearing would simply drop though the housing
The old bearing had been bodged with nicks in the brass casing to make it tight

There are two almost identical sizes of bearing. The metric bearing is 45mm and the imperial bearing is 1.75" which is 44.5mm
I'd struggled to decide which size I needed and eventually decided the housing entry must have a slight chamfer and went for the imperial size
Turns out I should have gone metric!
No great harm done. I've ordered the metric bearing to be delivered straight to my mate on Monday and I'll see if I can get a refund on the other one (at £32 it's not the end of the world if not)
It won't even hold things up as there's no way we'll be ready to start reinstalling the stern gear until late next week at the earliest
Tuesday, 12 July 2016
We're no longer shafted

It's taken ten hours of fiddly awkward work but step by step I've managed to ease the shaft out of the coupling
The method is simple enough. Stick a socket or bolt between the gearbox coupling plate and the end of the shaft and do up temporary bolts to push the shaft out
Restricted access however meant that I had to do it in stages starting with long bolts then swapping them for medium bolts and the again for short bolts before starting the whole process again with a longer socket between the shaft and gearbox
It's not a job I'd want to do again in a hurry!
In breaks between bouts of winding, I got the orders in for the new parts and bolts. To save faffing about, I've ordered a new split coupling which is costing less than £60. It will save no end of time trying to drill the bolts out of the old coupling
Tomorrow I'll need to tidy up the cockpit before doing anything else. Then, if the weather improves, I'll go back to removing antifoul for a day or two. That's no fun either but at least it's a variation in savage amusement!
Monday, 11 July 2016
Here I go again...
... On my own
At least for a few days
The mission for today was to remove the prop shaft and stern tube
The tube is already undone and has been left in place only to protect the shaft
I could manage, with difficult, to do what must be done without removing the shaft but pulling it will make life a lot easier
And in any case, having dismantled most of the stern gear already, we've decided it makes sense to bring forward the replacement of the stuffing box gland with a packless seal
That had been on the long term "future plans" list but given the time and expense involved in removing the rudder, prop, cutlass bearing housing and stem tube, it'd be daft not to do it now
So all that remained to be disassembled was the shaft coupling ...
 (The gearbox is to the right. The coupling is bolted to the backend of the gearbox and clamps onto the shaft)
The coupling has to come off to allow the existing stuffing "box" to be removed and replaced with a PSS seal. That's the stuffing boz to the left complete with the tube from the remote greaser
The two forward bolts on the clamp came undone easily. However, the aft two bolts are rusted solid. I tried everything in the armoury up to and including heat and a breaker bar but budge they would not.
Tempting though it was to decide to forget about fitting a PSS for now, it's just storing up trouble for the future. Who knows what might happen. We could, for example. damage the shaft in a remote location and need to get a replacement shipped out to somewhere with limited access to engineering facilities
Nope, those bolts have got to come out
The only option was to cut the nuts off. And the only way to do that was with my Dremel type multitool. There simply isn't room to get a hacksaw at them and trying to wield an angle grinder in such a confined space with parts of my body in close proximity to the job was not to be contemplated
I was running short of cutting discs for the multitool so a trip over to Chelmsford to get some more was necessary. On the way I had a blow out on the offside rear tyre at the roundabout below the A12 which cost me an hour changing the wheel and trying to find a tyre depot interested in doing some work instead of standing around chatting.
Ho hum
Back at base at last, the nut came away after about ten or fifteen minutes work but the bolt would still neither turn nor budge when I tried to drift it out. Oh well, nothing else for it but to cut the head of the bolt off as well. Half an hour of cutting and grinding back and the head was off and cleaned up
Still the remains of the bolt stubbornly refused to shift.
At which point I managed to catch the case for the multitool with the mains cable and it all fell into the bilge below the shaft!
After a good swear, and it being late in the day, I called it quits for the night
Tomorrow, I'll try to cut the bolts in the middle between the jaws of the clamp. If successful, that should release the clamp and allow the shaft to be withdrawn. (If not, the only remaining option is to try and drill the bolts out in-situ which will be damned difficult)
I'll then unbolt the coupling from the gearbox and get it on the workbench to drill out the bolts
It's all, as I suspected and feared it might, taking rather longer than I'd ideally have liked and costing more money too. But we'll get there in the end
At least for a few days
The mission for today was to remove the prop shaft and stern tube
The tube is already undone and has been left in place only to protect the shaft
I could manage, with difficult, to do what must be done without removing the shaft but pulling it will make life a lot easier
And in any case, having dismantled most of the stern gear already, we've decided it makes sense to bring forward the replacement of the stuffing box gland with a packless seal
That had been on the long term "future plans" list but given the time and expense involved in removing the rudder, prop, cutlass bearing housing and stem tube, it'd be daft not to do it now
So all that remained to be disassembled was the shaft coupling ...

The coupling has to come off to allow the existing stuffing "box" to be removed and replaced with a PSS seal. That's the stuffing boz to the left complete with the tube from the remote greaser
The two forward bolts on the clamp came undone easily. However, the aft two bolts are rusted solid. I tried everything in the armoury up to and including heat and a breaker bar but budge they would not.
Tempting though it was to decide to forget about fitting a PSS for now, it's just storing up trouble for the future. Who knows what might happen. We could, for example. damage the shaft in a remote location and need to get a replacement shipped out to somewhere with limited access to engineering facilities
Nope, those bolts have got to come out
The only option was to cut the nuts off. And the only way to do that was with my Dremel type multitool. There simply isn't room to get a hacksaw at them and trying to wield an angle grinder in such a confined space with parts of my body in close proximity to the job was not to be contemplated
I was running short of cutting discs for the multitool so a trip over to Chelmsford to get some more was necessary. On the way I had a blow out on the offside rear tyre at the roundabout below the A12 which cost me an hour changing the wheel and trying to find a tyre depot interested in doing some work instead of standing around chatting.
Ho hum
Back at base at last, the nut came away after about ten or fifteen minutes work but the bolt would still neither turn nor budge when I tried to drift it out. Oh well, nothing else for it but to cut the head of the bolt off as well. Half an hour of cutting and grinding back and the head was off and cleaned up
Still the remains of the bolt stubbornly refused to shift.
At which point I managed to catch the case for the multitool with the mains cable and it all fell into the bilge below the shaft!
After a good swear, and it being late in the day, I called it quits for the night
Tomorrow, I'll try to cut the bolts in the middle between the jaws of the clamp. If successful, that should release the clamp and allow the shaft to be withdrawn. (If not, the only remaining option is to try and drill the bolts out in-situ which will be damned difficult)
I'll then unbolt the coupling from the gearbox and get it on the workbench to drill out the bolts
It's all, as I suspected and feared it might, taking rather longer than I'd ideally have liked and costing more money too. But we'll get there in the end
Sunday, 10 July 2016
With friends like these ...
No photos today, I simply forgot to take any!
The mission was to remove the cutlass bearing housing from the stern tube. The problem was a lack of any tools big enough to get a grip on the housing. My ancient Stilson pipe wrench, in my toolbox since I was an apprentice, would get a grip on the tube but we needed a bigger pair to get round the housing
Foraging in the nearest DIY stores turned up nothing but on arrival back at Fambridge I was happy to find that Tony had blagged one off James ("Jan Steen")
The damn thing was still being stubborn but ten minutes with the blowlamp and off it came
With that success, Glen headed off for home
I then set about undoing the clamp bolts that secure the inboard end of the prop shaft to the shaft coupling. Although I could do what absolutely needs to be done without removing the shaft, with it out I can tidy things up properly. I'm also considering, now that we've all but dismantled the stern gear anyway, replacing the packing gland with a packless seal now rather than later
Two of the four nuts came undone easily. The other two are rusty and proving stubborn. Copious WD40 overnight might shift them, after that it's the blow torch again. If all else fails, I'll cut them off (they've got to be replaced anyway)
That was the end of the fun for the day 'cos Tony had decided to move Pleinair round into the marina. So we did a bit of boating in very windy conditions. Tony then headed off for the working week
Tomorrow I need to ring round and sort out who gets the job of pressing out the old cutlass bearing and pressing in a new one. I also need to order the bits I need from the prop manufactuer and I need to look at whether to do the seal or not
And of course there's the acres of bottom that still need scraping and sanding!
But after a frustrating start, the week has ended with encouraging progresss
And it's all thanks to those friends. Without their help I'd have got nowhere fast. Thanks everyone (you know who you all are)
Saturday, 9 July 2016
Success!
It was a bit of a bleary start to the day but eventually we got ourselves moving and set about the first job of the day.

Removing the rudder proved easier than expected but I was glad of the help. It would have been damn difficult on my own
Next up was another attempt at getting the prop off. A friend had access to a hydraulic puller and it did the job. It made us all jump when it finally shifted with a hell of a bang!

The next job we tackled that also needed more than one pair of hands was removing the damaged wind vane steering gear
Removing the mounting bolts proved easier than I'd feared and off it came. It was heavier than I expected, must be 25 kilos at least

The stern certainly looks a lot cleaner without it. There's a fair bit of work to make good which I'll tackle over the next couple of weeks
The final job for the day was getting the bolts out ready to remove the cutlass bearing housing
The top bolt came out easily but the bottom bolt proved a problem. It's supposed to be in a tapped hole in the internal backing plate but it turned out on Pagan there's a nut which is totally inaccessible
In the end, the only option was to get the angle grinder out and cut the head off the bolt
That done, it was time to wrap up for the day
Tomorrow we'll hopefully get the stern tube out and see what's what with the shaft. Hopefully it's not damaged. Then I'll need to organise getting the cutlass bearing replaced
"To Do" list updated
The rolling "to do" list (see link in pages section to the right or click To Do List) has been updated
It's very long!
As we work through it completed tasks get crossed out
I can't find a way to automatically sync the page with Google Tasks so it'll have to be manually updated
Yesterday, by the way, was a shopping and preparation day laying in supplies, materials etc.
Today, when the sleeping uglies finally awake, will be rudder removal and hopefully prop off
Thursday, 7 July 2016
A better day
I was up and at it good and early continuing the tedious and arm aching job of stripping the hull back to a good surface
A mate turned up unexpectedly with a set of hydraulic gear pullers but they wouldn't quite fit. However, we reckon that with shorter legs and the rudder removed they may work so he's bringing them back in Saturday for another try
I took a break from antifoul removal to dig a hole under the rudder. I reckoned by eye we'd need about a foot more to get it off, we'll see in due course how good my eye is!
Then it was back to another bout of stripping. I'm developing the most time and energy efficient technique as I go along
This is a close up of the problem I'm dealing with...

That's a typical area before I start on it. Just the pressure wash off when she was lifted out has left a patch that is right down to the thin layer of sound epoxy, probably a single coat of Gelshield or similar, surrounded by the thick layer of blue (I suspect) badly applied epoxy overlaid with several layers of old antifoul
The technique as it stands is to attack an area with the 100 bar pressure washer on needle jet setting. It's not quick but it removes most of the old antifoul and quite a bit of the unsound epoxy at no cost and with minimal effort
Stage two is to attack any remaining antifoul with a tungsten carbide scraper. That takes some effort but it rapidly cleans back to the failed epoxy and softer patches of that come off too
That leaves the harder areas of epoxy largely untouched. However, I've found that Nitromors paint stripper will soften it quite effectively (suggesting that perhaps it isn't epoxy after all or that it was badly mixed or applied in the wrong conditions).
It takes two applications of stripper, the second about ten minutes after the first. Then give it twenty minutes or so and a good thickness can be peeled off with a 4" steel scraper
Stubborn and really thick areas may take two or three goes to clean back. After that, a thorough pressure wash, leave it to dry off and it's ready for sanding
A thorough going over with 40 grit on the big sander leaves a decently flat surface ready for finishing
The waiting between bouts of stripping and sanding was not idle time
It proved surprisingly easy to remove the rudder quadrant. At which point I discovered that the rudder now moved easily with no stiffness at all. This suggests that the very stiff and heavy helm is not down to worn rudder bushes as we'd assumed (I'll inspect the bushes and may replace them anyway as they're not overly expensive)
So it must be either the rudder cables or the autohelm motor drive that's causing the problem. More investigation, and probably more money, required
Back to the plot..
The next step after removing the quadrant was to undo and remove the single bolt that secures the collar to the top of the rudder post. This proved straightforward too once I knocked a wedge in to take the weight of the rudder off the collar
All I had to do then was knock the wedge out and the rudder dropped the half an inch or so onto the blocks I'd placed ready

When more hands are available we'll remove the rudder completely and inspect the bushes and seal
Another ten hour plus day and by the end of it I really needed a shower. So off I traipsed to the facilities. A lot cleaner and much refreshed, I treated myself to a curry and a couple of pints in the pub
Whilst quaffing I checked my emails and a helpful email from the tech guy at the prop manufacturers advised that they sell or rent out a suitable puller for the Featherstream prop. If the plan for Saturday doesn't work that's the next option
Tomorrow I may take a break from stripping. Glen is down for the weekend and I think we'll tackle some of the engineering works while he's here.
Wednesday, 6 July 2016
A frustrating day

My first mission this morning was to rig up a cargo hoist. Carrying things up and down a ladder is somewhat awkward and with my dodgy knee a potentially risky business
So I lashed the mizzen boom to port, dug a suitable crate out of the container, and made a couple of loops of nylon line to which I shackled the port mizzen sheet block
So now I can hoist and lower cargo to and from the deck in complete comfort and safety!
The first cargo was somewhat less than salubrious - the Portapotti tank needed emptying. The Elsan disposal point is round at the marina but I had to run round there to pick up the gear puller I'd ordered from Screwfix yesterday anyway
Whilst I was out, I nipped up to Wickes at Maldon for more paint stripper and a better scraper
On my return, I set about trying to remove the prop again. To my utter annoyance, the puller I'd ordered was no bigger than the one I'd got. A snotty email has been sent to Screwfix customer services about that.
 Still, as it only cost £12 I've got more important things to do than worry about misleading product descriptions. After some head scratching and experimentation I fettled up a means of actually getting a pull on the base of the prop boss using parts from both pullers and a g-clamp
At last, I thought. And the g-clamp bent like a banana whilst the prop stayed stubbornly put
There's only one more thing I can think of to try. Maybe if I disconnect the prop shaft at the coupling, unbolt the stern tube and cutlass bearing housing then perhaps I can get enough down angle on the shaft to withdraw it complete. I suspect I'm on a hiding to nothing and the prop won't clear the rudder skeg but it's my last hope
The prop doesn't actually need to come off. It's the cutlass bearing housing I need to get off. So it doesn't really matter if the prop stays on the shaft if I can withdraw the shaft
Oh and on the subject of the prop pitch, the manufacturers got back to me to say that our speed test figures are roughly what they'd expect. I'm far from convinced. They say they'll supply a new pitch cassette set 1" coarser for £105+VAT. Their literature says, and I quote "Replacement pitch cassette for easy pitch adjustment - supplied free of charge.". Questions will be asked (again)
Defeated by the prop, for now at least, I cracked on with removing the layers of anti-foul from the port bow. Yesterday, I'd used Wickes own brand paint stripper and whilst it had some effect it wasn't brilliant. So I'd spent three times to money on Nitromors which at least smells like it's evil stuff. It proved more effective too but I hit a problem
There's several layers of old antifoul - there's two layers of worn out self eroding over a layer of hard racing and then there's a thick layer of truly horrible stuff. Beneath that is another layer of old antifoul and then you're finally down to a thin layer of epoxy over the original gelcoat
It's that thick layer of horrible stuff that's giving the trouble. In places, it's come off in slabs leaving craters that wouldn't disgrace the moon. In other places it's as hard as steel. The Nitromors will soften it up to a certain extent but then it's a pig to scrape off forming big lumps of very sticky gunk that clog the scraper blade within seconds. Unsoftened, it won't scrape worth a damn. It won't sand either, it just clogs the sanding disc
I can get it off, eventually, but it's going to take a lot of stripper, which isn't cheap, and the gods alone know how much time and effort. I've spent what amounts to a whole day on the port bow and I've stripped most, but by no means all, of it back for about four feet from the stem. Only another 29 feet to go and then there's the other side. I reckon I'm looking at two weeks work, at least and that's just to strip it. Then it will have to be cleaned up, any imperfections and the inevitable scraper damage made good before being antifouled
I've not totally up my mind made but I'm leaning heavily towards calling it quits for the time being. Certainly, if I carry on there is no chance at all we'll be back in the water before the end of the month and that would put paid to any chance of getting away for a sail this year. And in any case, there's a long list of more pressing jobs to attend to.
We'll see what tomorrow will bring
Tuesday, 5 July 2016
Under pressure ... wash

 I was up pretty early for me and set about sorting out some tools and tidying up the container and the van
 As promised, Wiggy and Adam were round early doors to pressure wash the hull and move Pagan to her temporary home in the yard ...
It was blowing a bit of a hooly and I hadn't slept that well so I decided to have a nap which turned into several hours sleep!
Once refreshed with coffee, I headed up to the DIY store for some paint stripper and a big scraper
I'd mulled it over and decided that the thick layers of old anti-foul has to come off sooner rather than later and it might as well be done now rather than put off
Lathering the starboard side with the stripping gloop didn't take long and then, after a coffee break, I started back at the beginning with the pressure washer and scraper to see what came off

However, it did soften up the top couple of layers at least and the pressure washer shifted a fair bit more in patches - one of the reasons for getting rid of it before applying a fresh coat of expensive antifoul is that I don't want it failing due to the old stuff falling off
What I could have done without it finding that a few patches of the topsides paintwork are peeling off. Plus there's several runs and cracks in the paint. I'll have to decide whether it can be touched up, at least for now, or whether we're going to have to repaint the whole of the upperworks while we're out
If we have to repaint it's likely to scupper our plans to go sailing in August. It's going to be a push to get everything done in 3 or 4 weeks as it is.
The bigger puller arrives in the morning so it'll be back to trying to get the prop off tomorrow
I need a bigger hammer
I'd booked to be lifted out today but with high water not due until 13:40 it wouldn't be happening early
So the morning was spent giving the interior of the boat a good clean. Just routine domestic stuff but it needs doing regularly.
And then, in due time, the lads were ready to lift us out. Due to the configuration of the slipway and the way Pagan was lying alongside the pontoon, she needed turning around to get the dory on her port side so with Wiggy aboard to cast off, I started up the engines and had a go at reversing down the inside of the pontoon against a fairly stiff flood tide
It's not a manoeuvre I'd normally attempt! But with the dory on hand if things went awry it was a challenge I couldn't resist. By and large, it proved surprisingly easy hampered only by the stiff steering, the sticky throttle cable and my losing track of how much rudder angle I'd got on a couple of times.
With the throttle cable sticking at the end of its travel, as I discovered when we motored of the berth, the engine is ticking over rather fast which had us flying along backwards at quite a rate of knots! That, coupled with the tide, meant that too much rudder angle would have the rudder slam hard over and it was then impossible to straighten it up until the speed had dropped and the stern had turned out of the full force of the tide.
So my progress was somewhat erratic but it got the job done. With the tickover problem sorted out (it's on my list!) and practice I'm sure I could do a better job of it and unlike our previous boats Pagan seems to be quite controllable going astern
 Although I could have motored round, the dory was on hand anyway so made fast and towed us round to the travel hoist. After a bit of faffing to get the slings rigged right out we came.
 Being lifted out always makes me nervous! And Pagan is far larger than our previous boats as becomes evident when she's out of the water
But the yard hands know what they're doing and all was executed safely
I'd agreed with Wiggy that we'd sit in the slings overnight and be pressure washed and chocked up in the morning as the lads had a long list of boats to launch round at the marina and limited time to do it
 So it was out with a set of ladders so I could get aboard, on with the shore power so I could boil a kettle for coffee and then it was time to get cracking on the first critical job - removing the prop
 The prop has to come off so that I can remove the cutlass bearing housing (the tube bolted onto the boat ahead of the prop)
The housing needs to come off because the cutlass bearing needs replacing. It's a press fit into the housing and I'll need to either find a local engineering firm who can press out the old bearing and press in the new one or take the housing to one of two firms, one in Isleworth and the other in Fareham! Long journeys either way, assuming I can arrange for it to be done while I wait, as I'm rather reluctant to entrust the housing to a courier. If it went AWOL it would be an expense I could well do without to replace it (and a like for like replacement could be hard to obtain so I could end up having to do yet more work to fit different gear)
The anode was half off already and needs replacing. The securing nut came off worryingly easily! I'll need new locking washers and a generous dollop of Loctite when it goes back on (I suspect the Loctite was omitted when it was fitted, there's no sign of any)
Even with some assistance, hammering didn't shift the prop at all
 I'd got a three legged gear puller in amongst the tools I retrieved from the tool shed when we sold the house so it was out with that to see if it would do the job
It wouldn't! The housing for the feathering gears in the prop makes for a rather large boss and the puller I've got simple won't fit around it and get a grip on the base. As soon as you start winding it up, it pulls the legs apart and they slip
After several hours of trying to get the prop off, I gave up and went for a pie and a pint.
The next step is to try a bigger puller. £11.99 from Screwfix for a 6" puller (the one I've got is a 4" model) has got to be worth a punt. That will be delivered before 10:00am on Wednesday morning along with some overalls and a torque wrench (which I need for fitting the new glow plugs on the engine)
So first thing in the morning it'll be pressure wash and chock up time and then I'll start looking at the other jobs I need to do while she's out. The jury is out on whether I'm going to remove all the old antifoul on this occasion or not. The topsides definitely need some TLC though so I may make a start on that
The rudder needs dropping too but that's a job I really need assistance with so we'll tackle that at the weekend when Glen is down I think
Sunday, 3 July 2016
It ain't got nothing if it ain't got hole
(For those who don't get the title, it's a Terry Pratchett reference)
Today I got to go boating. Yay!
OK, it was only up and down the river but beggars can't be choosers
As we're coming out of the water tomorrow, I wanted to get off the mud berth a day early rather than leave it to the last minute. So having finished off the handover of SV Laurin to her owners, I set about getting ready
That entailed dropping the cockpit tent onto the aft cabin roof (I saw no point in removing it completely), sorting out lines and then starting the engine for the first time since March
A good dose of preheat, as I haven't fitted the new high power glow plugs yet, and she sprang straight into life. The tickover is a little high and on investigation the control cable is sticking slightly. That'll have to be sorted out but for the purposes of today's exercise I could live with it
I patiently waited until the tide was definitely slack, resisting the temptation to go for it any sooner and when the time was right carefully maneuvered out of the berth
It's tricky as there is a line to a buoy dead astern of us so we can't simply reverse out but a slightly undignified shuffle under power did the trick
With Tony aboard to take notes, we set off up the river to carry out a speed trial. As previously mentioned, I'm fairly certain the prop is pitched a little too fine
The trial involved noting our speed through the water, and over the ground for comparison, at intervals of 200 rpm between tickover and full power
We confirmed what I'd thought on the delivery trip in that she picks up speed smartly up to about 6 knots at 2,600 rpm bit thereafter just revs away freely with little gain in speed. At 3,300 rpm, with the lever hard against the cross beam that limits it's travel, she'd gained just 0.4 knots
So with our 42hp Merc screaming away we were flat out at 6.4 knots. The theoretical hull speed for the Westerly 33 is 7.15 knots so we're well over half a knot shy of it.
What's more, my feel for the boat is that there's just no power there. She's not digging in and the engine feels like it's lightly loaded. It is, in every sense, like driving a car in third gear
I'll send the results of the test off to the prop people in the morning and see if they agree
With the speed test complete, we moored Pagan alongside Pleinair temporarily

I then popped down to Burnham to do a car shuffle. Well, actually a van and Landrover shuffle to be precise!
On my return, we eased Pagan out and Tony slipped Pleinair and put her back on her buoy
Before heading off to the truck for the working week, Tony helped me get the genoa off - it's supposed to be off while the boat is ashore and I'm going to ring round and see if anybody can replace the UV strip whilst we're out
And that was that for the day
Oh, the hole!

Quite impressive I think! She's really dug herself in and it's a rather nice shape to my eye
Tomorrow is lift out, pressure wash and chock up day and then the work starts
Saturday, 2 July 2016
The naked Pagan
The refit is underway at last!
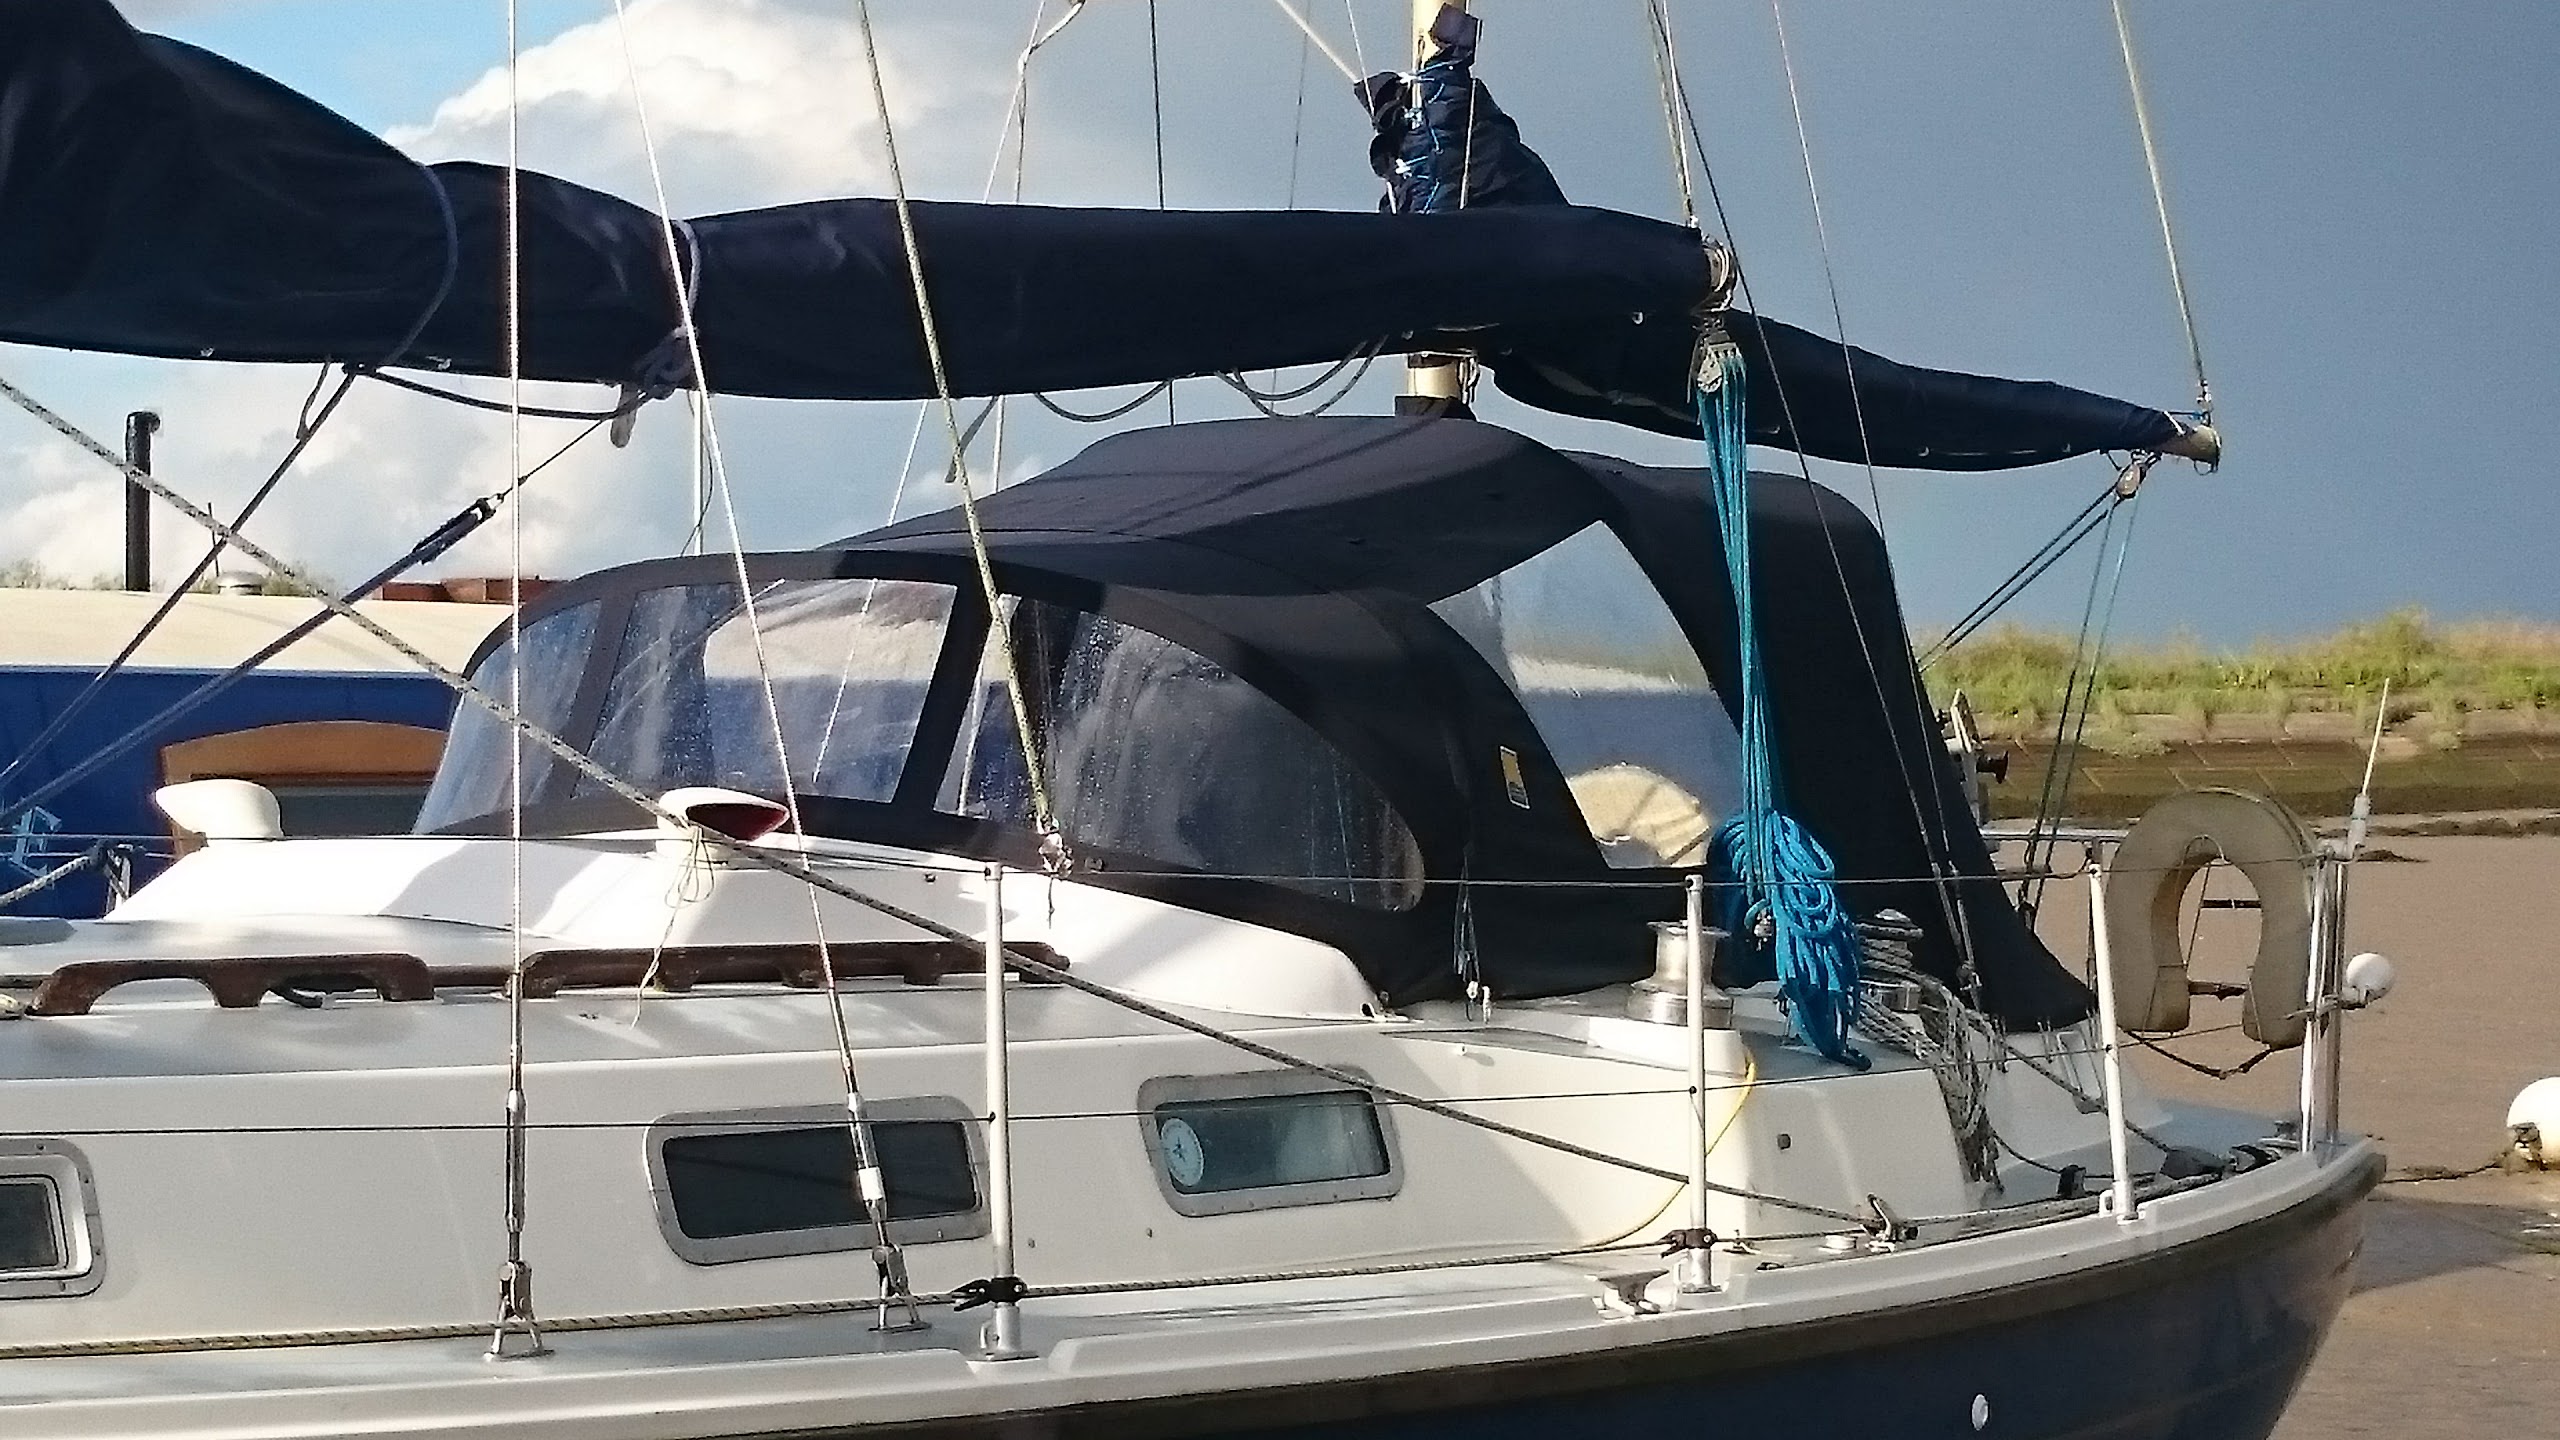
The clear plastic windows in the spray hood and cockpit tent were all shot. Something had attacked the surface of the plastic and turned it virtually opaque and we'd costed in having them replaced when we bought the boat
We'd anticipated it being the winter before it got done but Chris from Blue Marine rang us on Wednesday to say he could fit it in this week.
So yesterday afternoon he stopped by on his way from Burnham to his loft in Battlesbridge to pick up the spray hood and tent
That left Pagan looking rather sleek without her clothes on...

It wasn't even lunchtime today when Chris rang to say they were ready for collection. So I hopped in the van and nipped round to pick them up
I got the spray hood back on as soon as I got back and then put the tent back up later just in time as I'd no sooner finished than a thunderstorm rolled in
We now have the novel experience of being able to see out!

We're coming out of the water on Monday to sort out the sterngear and rudder bearings.
With that done there's the prospect of going sailing in August!
The clear plastic windows in the spray hood and cockpit tent were all shot. Something had attacked the surface of the plastic and turned it virtually opaque and we'd costed in having them replaced when we bought the boat
We'd anticipated it being the winter before it got done but Chris from Blue Marine rang us on Wednesday to say he could fit it in this week.
So yesterday afternoon he stopped by on his way from Burnham to his loft in Battlesbridge to pick up the spray hood and tent
That left Pagan looking rather sleek without her clothes on...
It wasn't even lunchtime today when Chris rang to say they were ready for collection. So I hopped in the van and nipped round to pick them up
I got the spray hood back on as soon as I got back and then put the tent back up later just in time as I'd no sooner finished than a thunderstorm rolled in
We now have the novel experience of being able to see out!
We're coming out of the water on Monday to sort out the sterngear and rudder bearings.
With that done there's the prospect of going sailing in August!